Behance is one of the best platforms when it comes to being creative while building your portfolio. The simple and easy-to-use platform will exhibit your work in the best possible and creative way and for free. The platform also lets you connect with like-minded people and search for job opportunities.
Creating a Free portfolio on Behance!
Now that you know about the Behance platform, you might be thinking about your web designing skills. Well, take a deep breath and stop thinking about these aspects of building a portfolio since Behance does it all for you.
Now if you are sure that Behance is the platform for you to showcase your work in a creative way. Then here we take you through the step-by-step process to set up your account and publicize your work while building a name for yourself at the same time. The process is easy and straightforward so you should be up and running in almost no time.
1. Register yourself with Behance
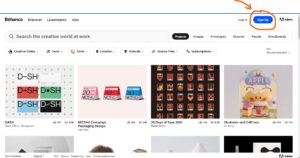
The first step on the way is to register yourself on the platform. This can be done either with an already existing email address or you can log in on the platform with your LinkedIn, Facebook, or Google+ account. Logging in with your social platform has an edge over the other method, it gives your work wider exposure, also you can share your projects on the go as soon as they are uploaded.
Behance Link: https://www.behance.net/
Once you are logged in, the platform will ask you to provide your basic details. When you are done with entering these details, you will be asked to follow at least one user, it will give you follow suggestions if you have logged in using social platforms.
Now that you have created an account on the platform, you are good to go with building your portfolio.
Also Read: 5 Ways to Improve Your Job Search Success : [Search Job effectively]
2. Your First Project
Now your account is ready and you are all set to build your portfolio. Start by clicking the ‘Upload my first project’ button and follow the prompts popping up on your screen. While your project images are uploading, Behance will allow you to add text and links to accompany them and personalize your page as per your choices. On the built-in panel, you can edit text, fonts, colors, etc. After uploading images and adding text, you can try out new designs using the ‘customize design’ panel, you can also embed videos via the ‘Embed media’ button given on the left panel.

Behance Screenshot
3. Adding tags to your project
Once you are ready with your project and its design, the next step after saving it is to add a cover image and the right project tag. Tagging plays a key role in categorizing your work and giving your project exposure upon search in the same category, so choosing the appropriate tag is of utmost importance.

Also Read: 6 Steps to Get your Dream Job : [ Check Now!]
4. Add more projects
After you are done adding your first project, you can add as many projects to your profile as you want. Although you can add a whole lot of your projects on the platform, it is best to go only for outstanding and great ones since the employers don’t have all the time in the world to go through each of them. So the best thing you can do is to add you’re relevant works.
5. Add personal and professional information
The next step involves adding more information about yourself and your work. To do this, click the ‘Complete your profile’ button provided on the ‘Getting started’ page and enter the details that people can use to find and connect with you.
Another feature of the platform is that you can also add your work experience. You can go to ‘Work Experience’ under ‘My portfolio’ to add your experiences and achievements. This way employers, as well as collaborators, can see your skillset along with your work in the visual form.
Check out the YouTube video for the complete process:
And here we come to an end. Now your Behance portfolio is ready and you are all set to flaunt your portfolio to the world.


0 Comments